Introduction
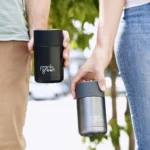
Frank Green has been making waves with their sleek, eco-friendly drinkware—and the push button lid? Total game-changer. In 2025, they’ve made some small tweaks, so whether you’re new or upgrading, this updated guide will make sure you assemble your Frank Green push button lid like a pro.
What is the Frank Green Push Button Lid?
The Design Philosophy Behind the Lid
Isn’t just about style—it’s engineered for one-handed convenience. Designed for on-the-go sippers, it lets you drink, seal, and carry without spills.
Key Features of the Push Button Mechanism
- One-click open/close system
- Leak-resistant silicone seal
- BPA-free, high-quality plastic
- Fits most Frank Green cups and bottles
Tools & Materials You’ll Need
What Comes in the Box
- Outer lid shell
- Push button module
- Silicone gasket
- Drinking spout
- Inner lid base
Additional Tools That Might Help
- Soft cloth for grip
- Tweezers for tiny components
- A bowl of warm water (for pliability)
Unboxing Your Frank Green Lid
Identifying All Parts Correctly
First things first: lay out all components. Compare them to the product manual or box illustration to avoid mix-ups.
Quality Check Before Assembly
Make sure there are no cracks, tears in the gasket, or deformed parts. If anything looks off, don’t force it—reach out to customer service.
Understanding the Components
Push Button Mechanism
This is the heart of the lid. It controls the open/close function and must sit snugly.
Silicone Seal and Gasket
These keep the liquids in and air out. Improper installation is the #1 cause of leaks.
Locking System
A series of ridges and grooves ensures that everything clicks into place and stays there.
Step-by-Step Assembly Instructions
Step 1: Placing the Gasket Correctly
Start with the silicone gasket—slide it around the bottom ridge of the drinking spout. It should sit flat and even, not twisted.
Step 2: Aligning the Lid Base and Inner Components
Drop the spout into the lid base and gently twist until it locks. Then, place the push button module in its housing, lining up the arrows (if marked).
Step 3: Securing the Push Button into Place
Press the button down and rotate gently until you feel or hear a soft click. Don’t over-tighten—this isn’t a jar of pickles.
Step 4: Testing for Functionality
Push the button and check if the lid opens smoothly. Try holding it upside down to ensure no leaks.
Common Mistakes to Avoid
Misplacing Seals or Gaskets
Even a slightly off gasket can ruin the seal. Always double-check positioning.
Over-Tightening or Forcing Components
If it doesn’t fit, something’s wrong. Forcing it can warp the plastic.
Skipping a Test Run
Always run a water test before taking it out. It’s better to leak over the sink than your laptop bag.
Maintenance Tips for Longevity
How Often to Clean Your Lid
Daily if you use it for coffee or tea, and at least weekly for water.
Lubricating Seals and Checking for Wear
A tiny dab of food-safe silicone grease on the seal every few months can extend its life.
Proper Storage
Keep it dry and loosely assembled when not in use to avoid warping or bacteria buildup.
Troubleshooting Assembly Issues
Lid Not Sealing Properly
Check if the gasket is twisted or out of place.
Button Not Popping Up
Could be assembled too tightly. Disassemble, adjust, and recheck the push button alignment.
Leaks or Spills After Assembly
Inspect for hairline cracks or missing pieces. Test with cold water first.
Frank Green Customer Support
When to Contact Them
If a part is missing, broken, or simply not working as it should.
Warranty and Replacement Options
Most parts are covered under warranty for manufacturing defects, and replacements are easy to order online.
Benefits of Assembling it Yourself
Understanding Your Product Better
You’ll learn how each piece works—making cleaning and troubleshooting much easier.
Saving Time and Avoiding Service Delays
Why wait weeks for service when you can fix it in five minutes?
Real-World User Tips
Community-Sourced Hacks
- Use a small silicone ring as a backup gasket.
- Store an extra gasket in your car just in case.
Shortcuts That Actually Work
Soaking stiff parts in warm water makes them easier to assemble without damage.
Final Quality Check After Assembly
Leak Test
Fill it up and shake it. No drips? You’re golden.
Button Responsiveness Test
It should press easily and pop up without sticking.
Lid Fit and Finish Inspection
The lid should sit flush with the cup. If it rocks or feels loose, recheck assembly.
Conclusion
Assembling your Frank Green push button lid isn’t rocket science—but it can feel like it without a clear guide. Hopefully, this 2025 updated version makes it way easier for you. Whether you’re sipping coffee on your commute or hydrating at the gym, knowing your lid is leak-free and ready to go is a great feeling.
FAQs
1. Can I put my Frank Green lid in the dishwasher?
Yes, but top rack only. Avoid high heat drying cycles to protect seals.
2. How do I know if the gasket is in the right position?
It should lie flat with no bumps or twists and form a tight seal when pressed.
3. Is it safe to use with hot beverages?
Absolutely. Just make sure the lid is securely assembled to prevent burns from leaks.
4. Can I replace the push button only?
Yes, Frank Green sells individual replacement parts, including the push button module.
5. What should I do if I lose a part?
Check Frank Green’s website—they have a parts shop where you can order replacements directly.
**Please don’t forget to leave a review.